Table of Contents
The module includes three main sections:
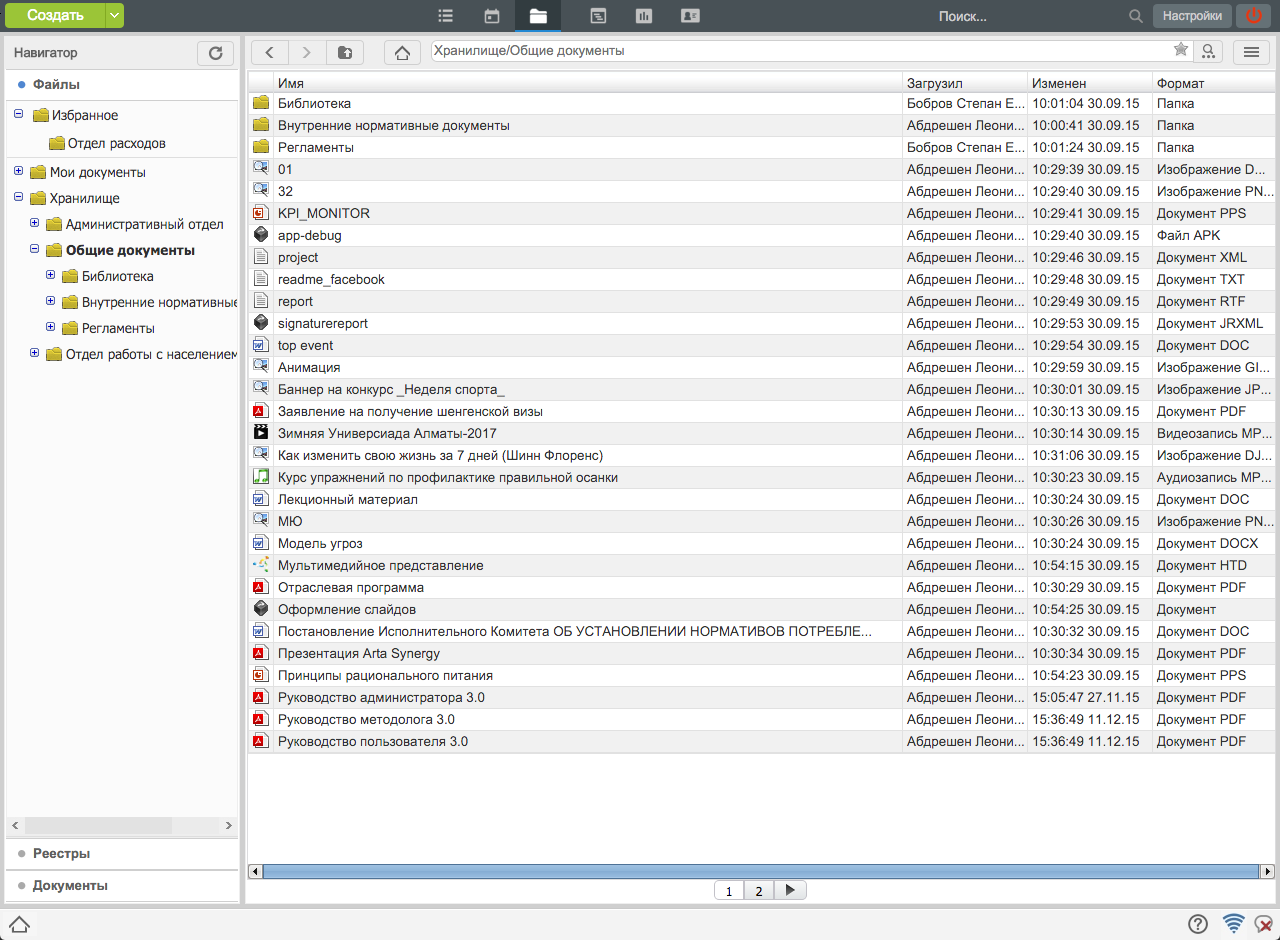
Files section is designed to upload, view, and search in text, video, audio, and graphic files.
Registries are designed to display structured information on basis of forms.
"Documents" section automates registration of incoming, outgoing, and internal documents; also allows sending and reception of emails, grouping the registered documents in dossiers and storing them according to nomenclature of dossiers.
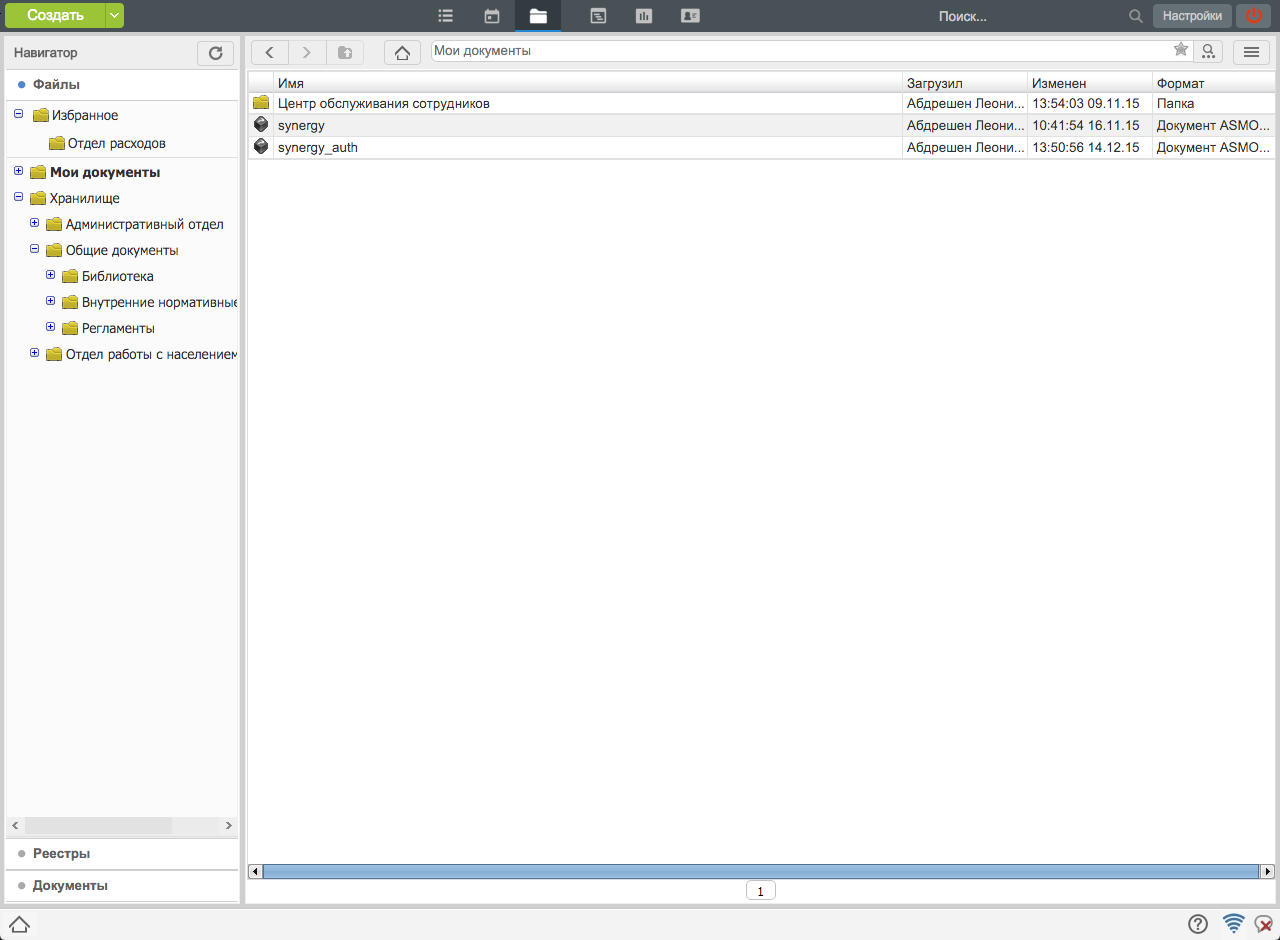
This section allows storing personal documents on the server. Left side of navigator displays personal documents folder of a user (My Documents), where he or she can create directory structure, add, edit and delete folders and documents as a user thinks proper. Search personal documents by entering document title in the search bar on the top panel.
Also navigator area shows folder to store and work with the corporate information in files of any format. A user can create bookmark to the current folder by clicking "star" button in the upper right corner. After that the folder is listed in the "Favourites" folder. Navigation pane shows repository structure as a hierarchy of folders.
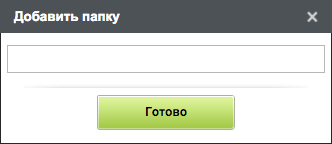
To create a folder, select a folder where the created folder will be located in and a user has access to, click "Create" button and select "Create folder" item.
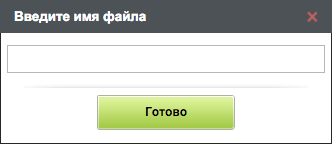
In the opened dialog (see Fig. 7.1.1.3. Creating folders in files section) enter folder name.
После чего нажать кнопку «Готово». Созданная папка появится в дереве ваших папок. Таким образом, можно создавать как папки, так и вложенные папки. Если выделить корневую папку, то справа в рабочей области отобразится ее содержимое: папки и документы. Вложенные папки можно переименовывать. Для этого необходимо выделить корневую папку, в правой части окна по нужной папке щелкнуть правой кнопкой мыши и в контекстном меню выбрать пункт «Переименовать». В появившемся окне вместо старого названия папки ввести новое и нажать кнопку «Готово». В контекстном меню присутствует пункт «Переместить», при помощи которого можно поменять местоположение папки. Удалить папку можно, вызвав соответствующий пункт контекстного меню.
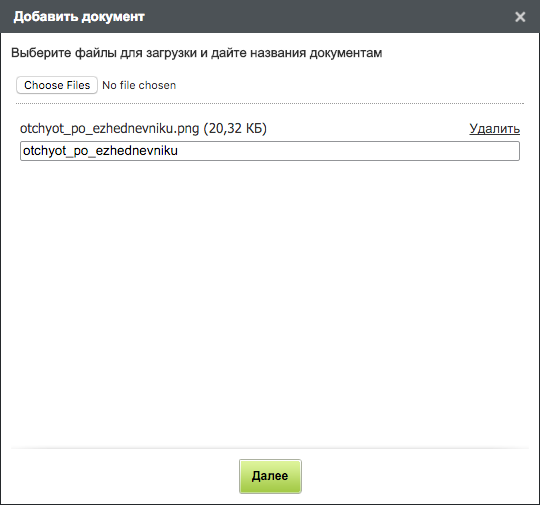
Для добавления документа в нужную папку, необходимо выделить папку и нажать кнопку «Создать» и выбрать пункт «Загрузить документ». В появившемся окне выбрать файл, который вы хотите добавить. После выбора файла в поле «Название документа» появится имя документа.
Нажав кнопку «Далее» вы можете проверить введенные вами данные, и если на этом вы решили, что никаких других дополнительных сведений о файле вы вносить не будете, то достаточно нажать кнопку «Готово» и файл добавится в список.
Файл можно загрузить не только с помощью пункта меню, но и перетащив необходимый файл (или несколько файлов) в область со списком файлов в режиме отображения «Таблица». При этом в дочерние папки загрузка невозможна.
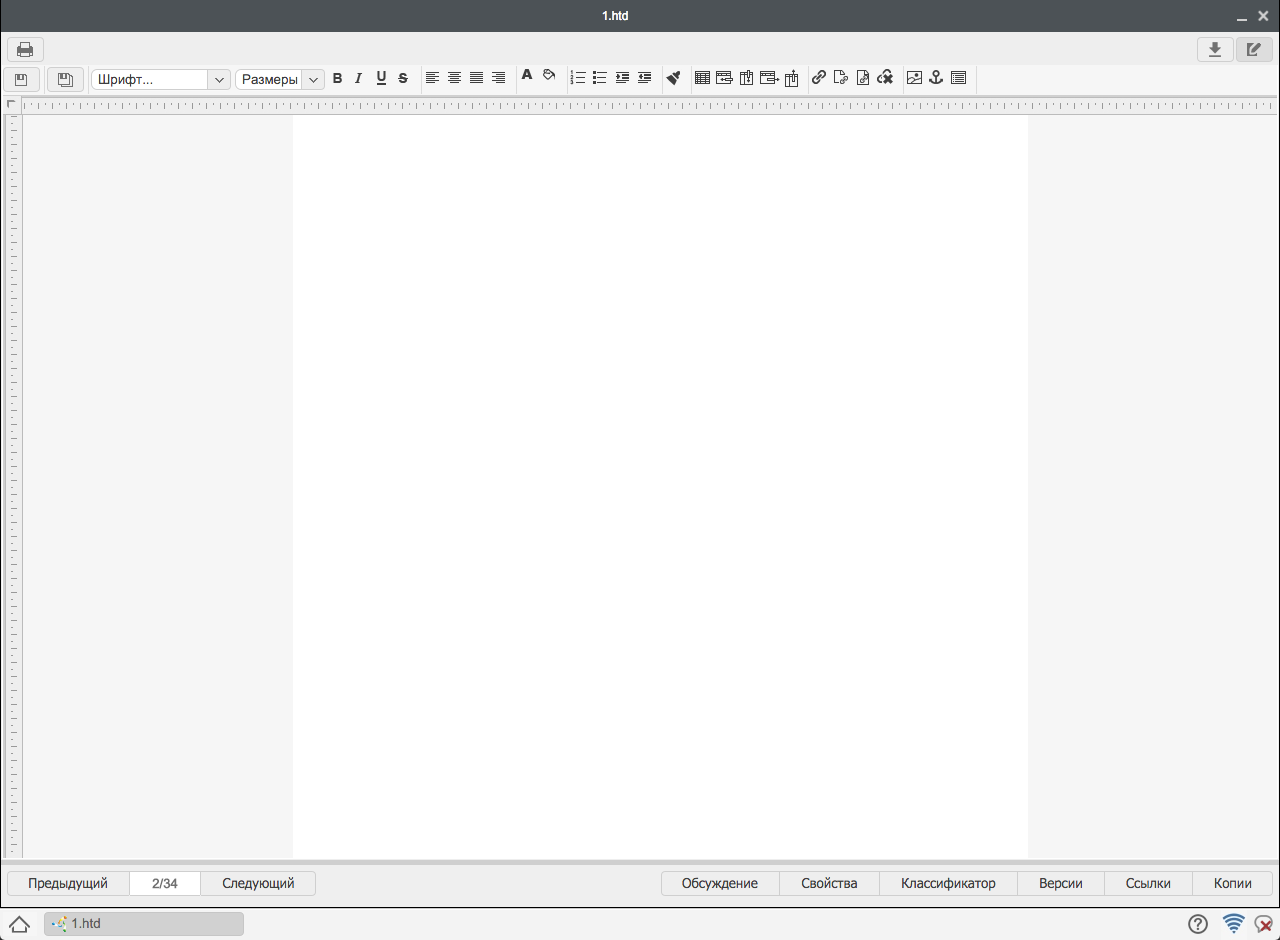
Для создания нового документа в папке, необходимо ее выделить и нажать кнопку «Создать» и выбрать пункт «Создать новый документ». В появившемся окне дать название документу.
Примечание.
В качестве названий файлов разрешено использовать буквы, цифры (0-9), символы " " (пробел),
.(точка),-(дефис),№,(,),$,;,^,#,!,_(подчеркивание).
Все остальные символы при загрузке заменяются символом “_” (подчеркивание). К данным символам относятся
,(запятая),:,?,*,+,&,\,/,|,''(одиночные кавычки),""(двойные кавычки),%,<,>,{,},[,],=,@, `(апостроф) и др.
By clicking "Apply" button, text editor opens where a user can enter required text.
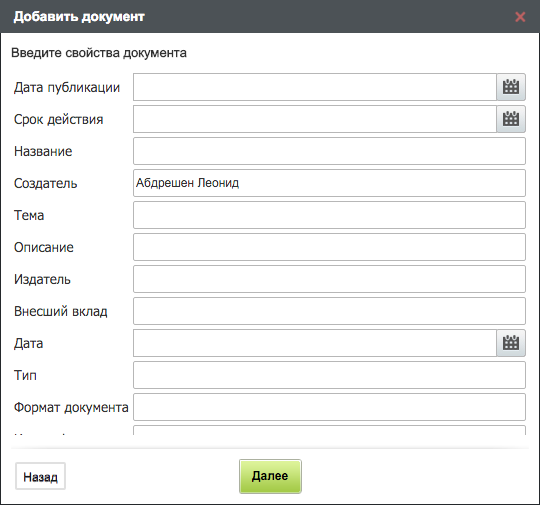
To add more details about the document when the document is loaded, click "Next" button to open a window where a user can enter document metadata (more information about the document, which can be used in searching or sorting documents) or in the preview window of the document by clicking "Properties" button, if a user has appropriate rights, the user can edit information about the document.
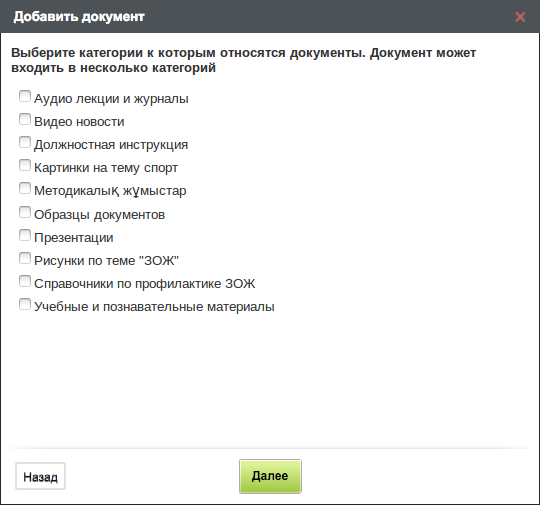
Following entering metadata, click "Next" button to select categories of document, i.e. to which categories the file will be uploaded.
Кнопка «Назад» позволяет вернуться назад и что-то изменить. Кнопка «Далее» дает возможность проверить введенные данные.
Кнопка «Готово» сохраняет документ, после чего он появляется в списке документов. Таким образом, можно добавлять различные виды документов, в разные папки, как в ваши личные, так и в общие, доступные всем.
To view and change meta data of documents (category, version and other properties) click corresponding buttons in the document view window.
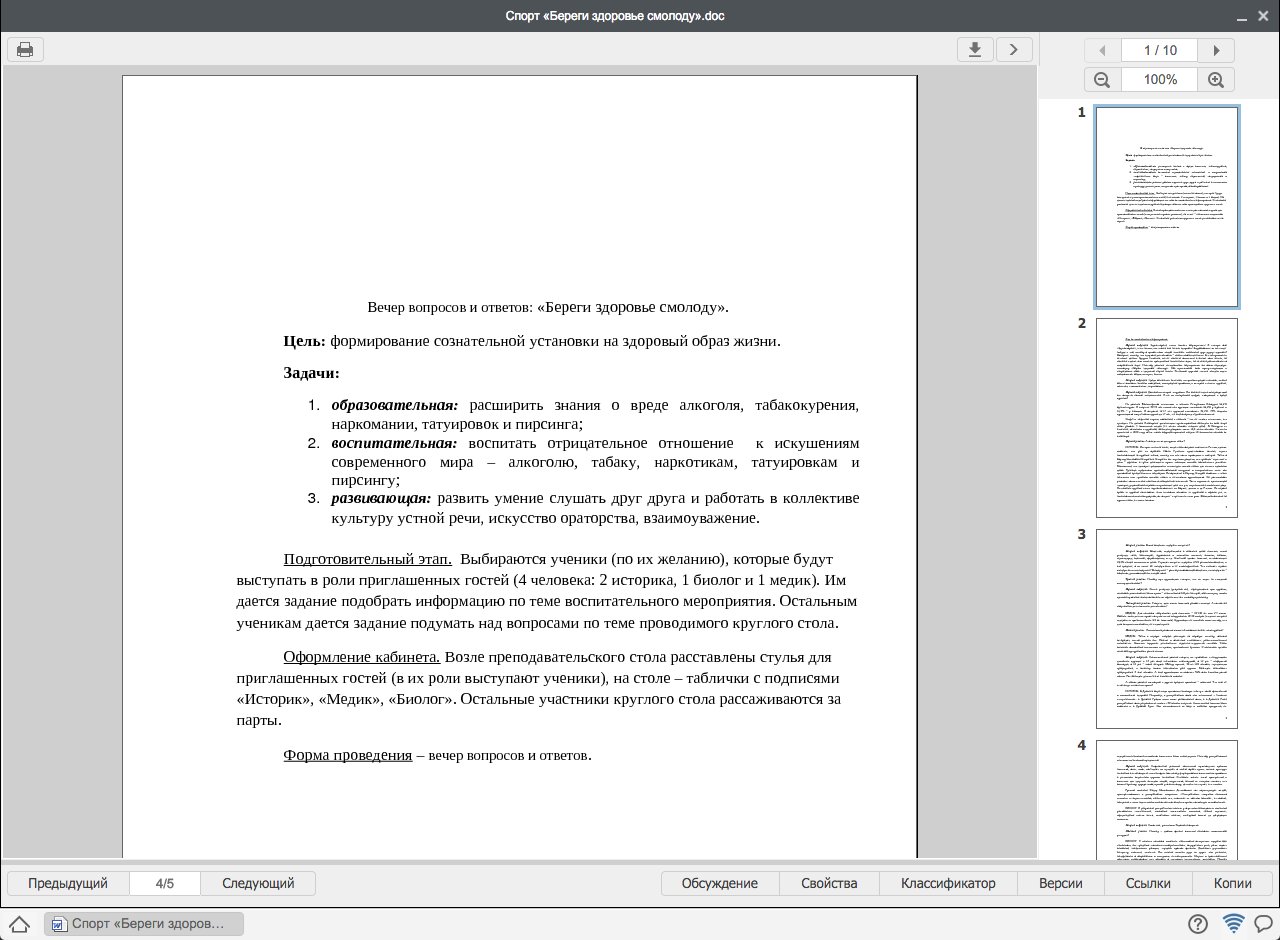
Open document for viewing by double click.
На правой боковой панели есть возможность просмотра документа по странично, увеличение или уменьшение масштаба просмотра, а также можно скачать документ. При необходимости можно убрать панель. Система позволяет просматривать текстовые файлы форматов: doc, docx, xls, xlsx, odt, odp, pdf, rtf, ppt, dwg; мультимедийные файлы форматов: mp3, avi; изображений форматов: png, jpg; чертежи форматов: tiff, dwg.
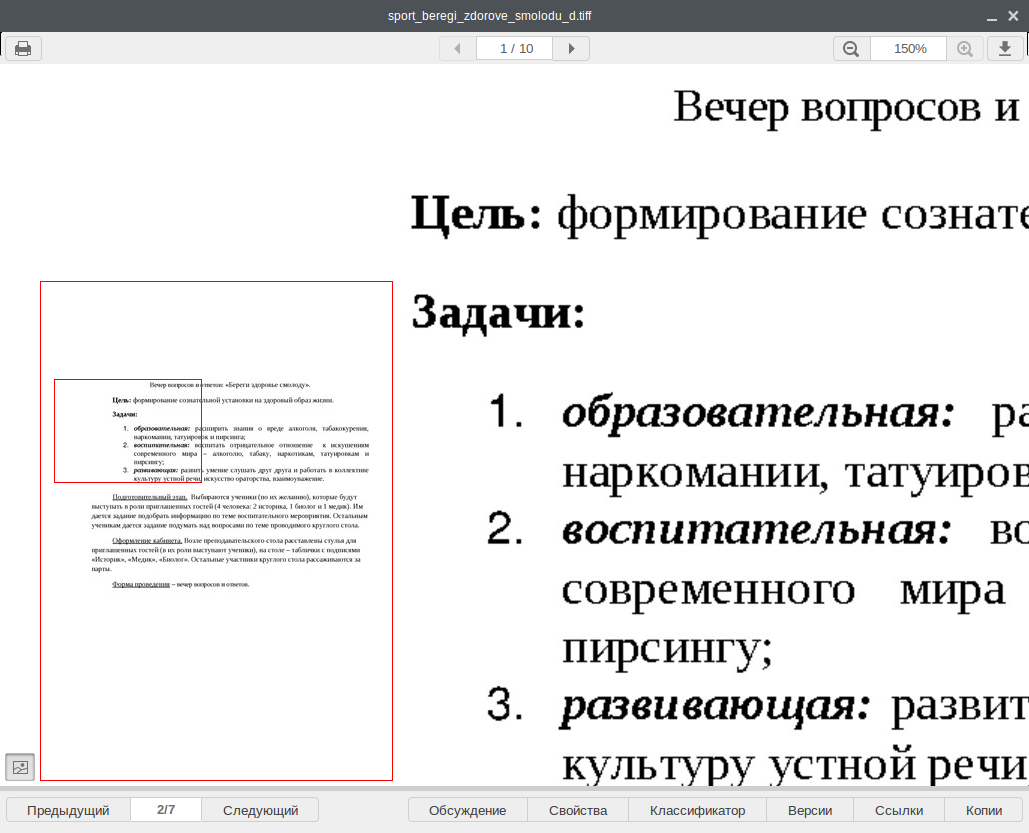
All TIFF format files can be viewed by a special viewer which:
opens only part which suits window dimensions - default viewing region is left top corner of page;
is able to move document page using mini map of page - by moving element showing viewing region on a page miniature;
is able to change viewing region of document page by dragging and moving with hand tool;
is able to change scale of viewing document page by selecting it from list: 10%, 25%, 50%, 100%, 150%. Default scale is 100%;
is able to navigate to the next and previous pages of documents (if they are present) without miniature use;
is able to print out currently viewing region as a separate image.
По умолчанию состояние мини-карта - скрыта. Для того чтобы восстановить мини-карту нужно нажать кнопку .
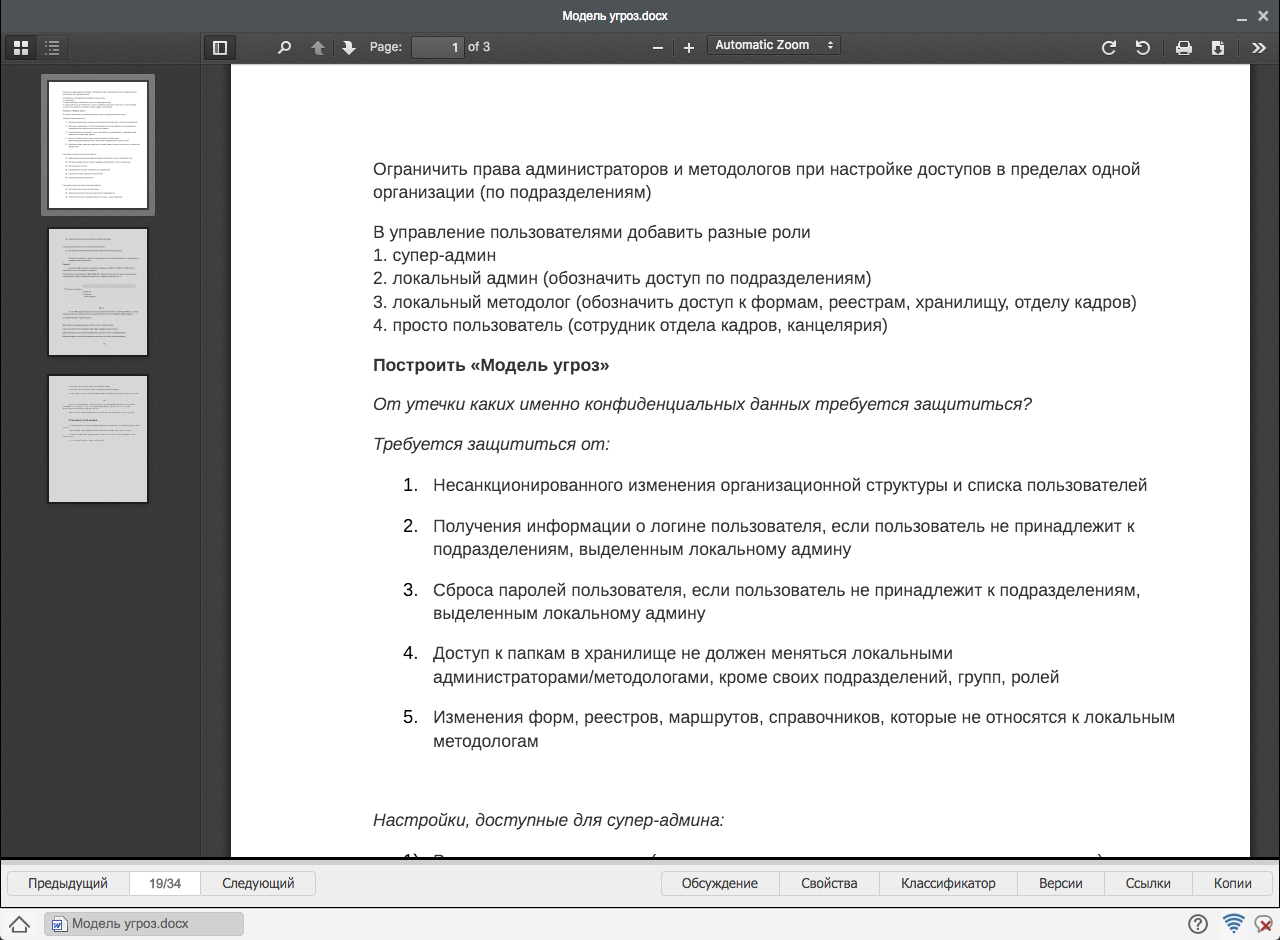
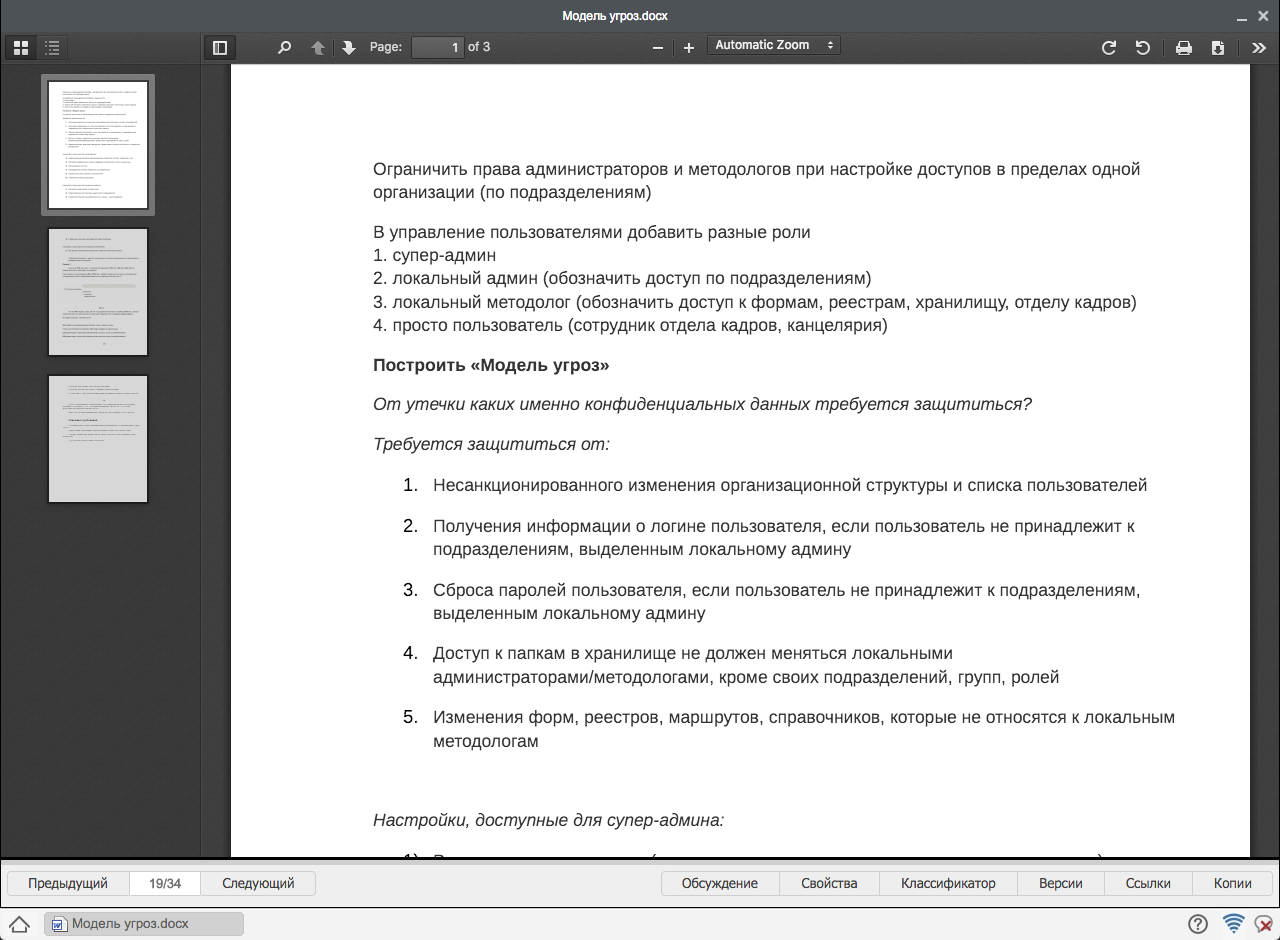
Если в пользовательских настройках включен альтернативный просмотр документов, то экран просмотра будет выглядеть следующим образом:
В таком режиме просмотра доступны следующие функции:
отображение боковой панели с режимами просмотра миниатюр либо содержания (при наличии)
поиск по документу
постраничный переход
различные варианты масшиабирования
повороты по/против часовой стрелки
отправка на печать
загрузка
инструменты по переходу на первую/последнюю страницу, включению инструмента “Рука” и просмотру свойств документа
Files section has function to edit document using context menu, which includes the following actions:
Create project (document project);
Create shortcut;
Upload new version;
Rename;
Move;
Download;
Download as PDF;
Delete;
Send by e-mail;
Сканировать документ.
If several files are selected, an operation can be performed on the selected files. If you download a group of files, the archive with them is downloaded.
If an user disabled e-mail, "Send by e-mail" item is hidden.
Для сканирования документов необходимо выбрать из выпадающего списка контекстного меню пункт «Сканировать документ». Процесс сканирования аналогичен таковому в потоках работ (см. илл. «Сканирование документа в пользовательском агенте»).
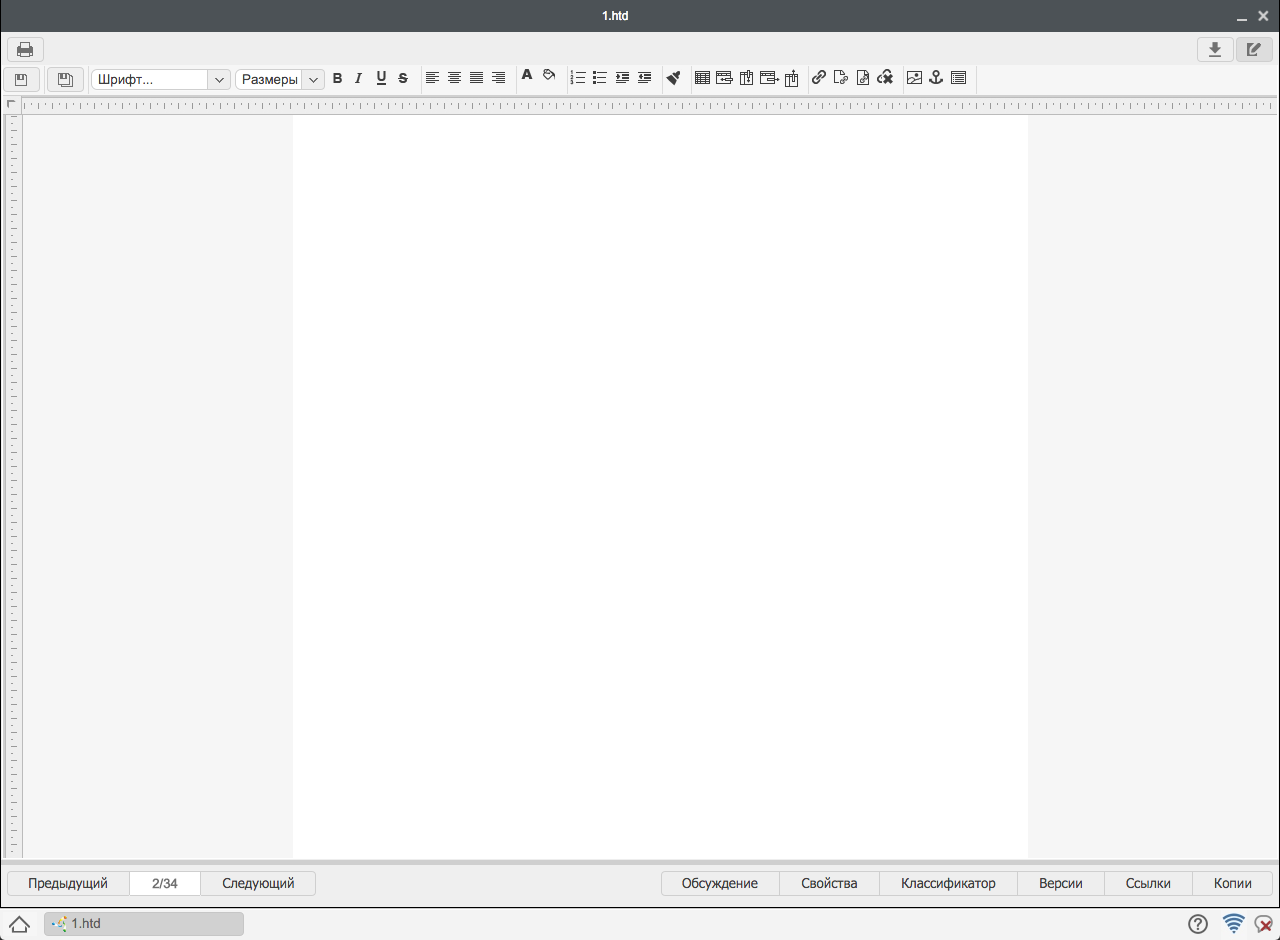
-cохранение документа, -сохранение версии;
изменение шрифта,-изменение размера шрифта;
выделение выбранного фрагмента жирным начертанием
Select with cursor a segment of text which should be bold and click the control button. To delete bold formatting, select the fragment and click the control button;
-выделение выбранного фрагмента курсивным начертанием
Select with cursor a segment of text which should be italic and click the control button. To delete italic formatting, select the fragment and click the control button;
-выделение выбранного фрагмента подчёркиванием
Select with cursor a segment of text which should be underlined and click the control button. To delete underline formatting, select the fragment and click the control button;
выделение выбранного фрагмента зачёркиванием
Select with cursor a segment of text which should be stricken out and click the control button. To delete stricken formatting, select the fragment and click the control button;
-выравнивание текста по левому краю
To align text by left side, select the paragraph and click the button;
-выравнивание текста по центру
To align text by center, select the paragraph and click the button;
-выравнивание текста по ширине
To justify text, select the paragraph and click the button;
-выравнивание текста по правому краю
To align text by right side, select the paragraph and click the button;
-изменение цвета текста, -изменение цвета фона
-создание нумерованного списка
An ordered list can be created in two ways:
Выбрать этот элемент управления и просто набирать названия пунктов, отделяя их переходом на новую строку
Сначала написать список, помещая каждый новый пункт на отдельной строке. Затем необходимо выдеить его мышью и выбрать данный элемент управления
To delete numbering, select all list and click the button.
-создание маркированного списка
An unordered list can be created in two ways:
Выбрать этот элемент управления и просто набирать названия пунктов, отделяя их переходом на новую строку
Сначала написать список, помещая каждый новый пункт на отдельной строке. Затем необходимо выделить его мышью и выбрать данный элемент управления
To delete unordered list, select all list and click the button.
-увеличение отступа абзаца от левой границы
To increase left paragraph indentation place mouse cursor at any position of the paragraph and click the button several times until the text is intended as desired.
-уменьшение отступа абзаца от левой границы
To decrease left paragraph indentation place mouse cursor at any position of the paragraph and click the button several times until the text is intended as desired.
-вставить таблицу,-вставить строку, -вставить колонку сверху, -удалить строку, -удалить колонку;
-вставить ссылку
Text can be made a hyperlink; in order to do so, click button and enter address and text of the link.
-вставить ссылку на документ
Если вы хотите добавить ссылку на другой документ нажмите на кнопку и в открывшемся окне в поле “Документы” нажмите на кнопку выбора и из Хранилище выберите нужный файл.
-ссылка внутри документа
If you want to add a link inside document, click button and select an anchor (which should be created and saved earlier) in the window.
-удаление ссылки
Text of a hyperlink can be transformed back to plain text. To do so, select a hyperlink and click this control button.
-вставка изображения на страницу
Click this button to open "Image properties" dialog window. If an image is not uploaded to server, select "Upload" tab, click "Find" button to find the image on computer and click "Upload to server" button. After that, select "Image information" tab and click "Find on server" button to select an image from uploaded ones. If an image is already uploaded and you know its address, insert the address to URL field.
-установка точки привязки в тексте документа
Anchor is a bookmark in document text which enables setting a hyperlink not only to a page, but also to a page section. To insert an anchor, place cursor to the place and click the button; enter anchor name in the opened dialog window.
-список точек привязок
Bottom panel of the window has buttons "Discussions", "Properties", "Document classifier", "Versions", "Links", "Copies".
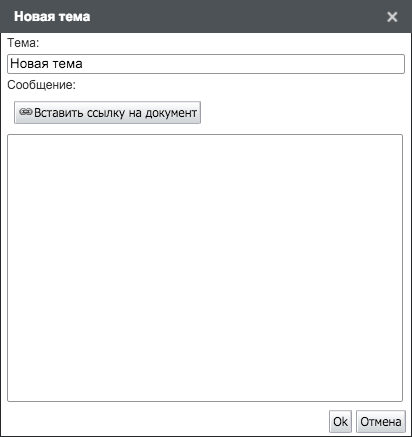
Здесь можно просмотреть темы для обсуждения, ответить на них или добавить свою тему. Для того, чтобы добавить тему, надо нажать иконку «Создать новую тему». Появится окно для заполнения новой темы. Здесь нужно ввести название темы, вставить ссылку на документ и сообщение, после чего нажать кнопку «Ок» или «Отмена».
The discussion will be listed in Discussions where users can reply.
To reply a message of a discussion, another user double clicks the discussion to open it.
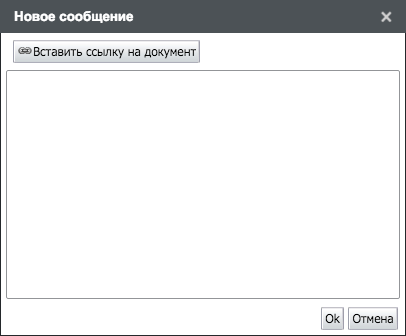
In the window opened click Reply button. A new message window will appear. Enter the message and click "OK" button. Your message will be listed in the list of messages .
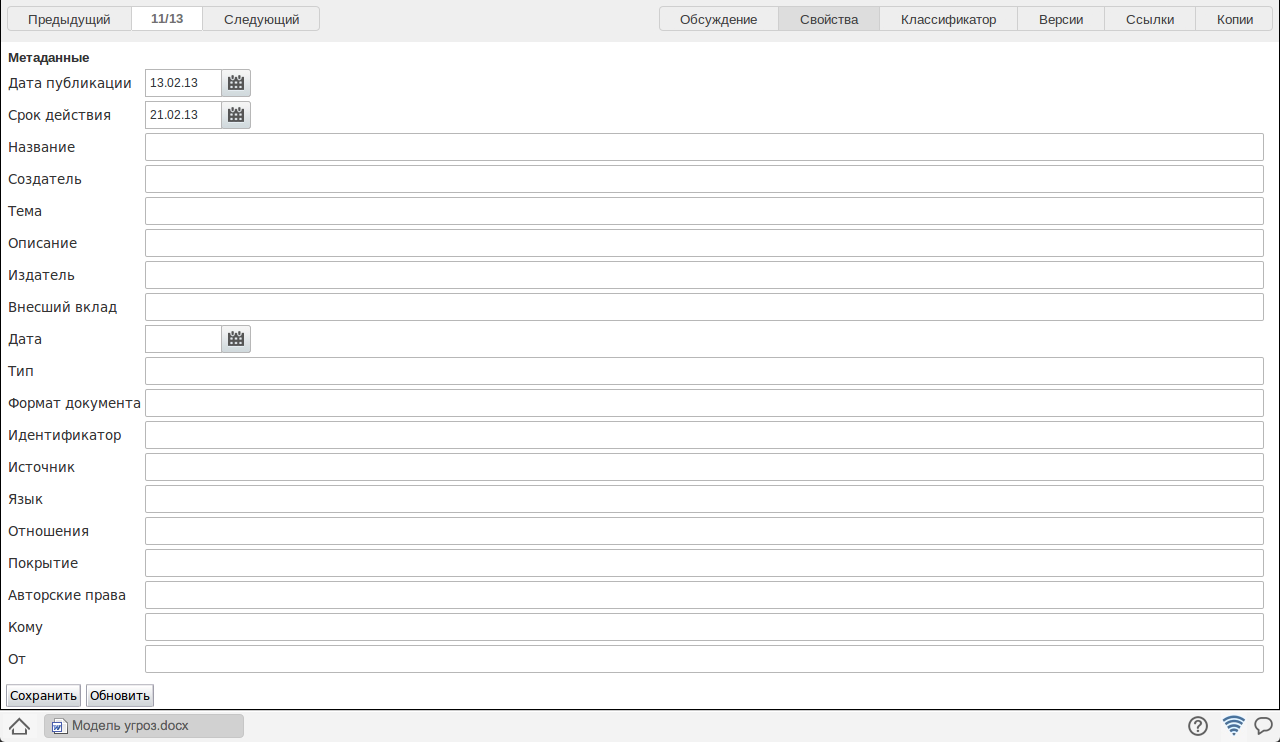
Здесь можно ввести изменения в свойствах документа и обновить метаданные при наличии соответствующих прав нажав на кнопки «Сохранить» или «Обновить». А также в разделе “Ссылки” можно увидеть абсолютную и относительную ссылку на файл.
You can see categories of the document and change it (if you have required rights).
You can see date of adding the document, user who added the document, file size and comments. In the window opened you can select any version of the document and click "Make current" button to make a selected version of the document the current one.
You can link files to the document by creating links to them here. In adding links window select a file using selection button, enter description and click "Save" button. List of links is shown on the figure below. They can be edited and added using corresponding buttons in the left part of the window.
The System is able to search document by entering its name in the search field; the document will be searched in all folders of the storage. Enter something in the search field and press "Enter" button to run search again. Enter something in the search field and click "Search in found" button to refine previous query.
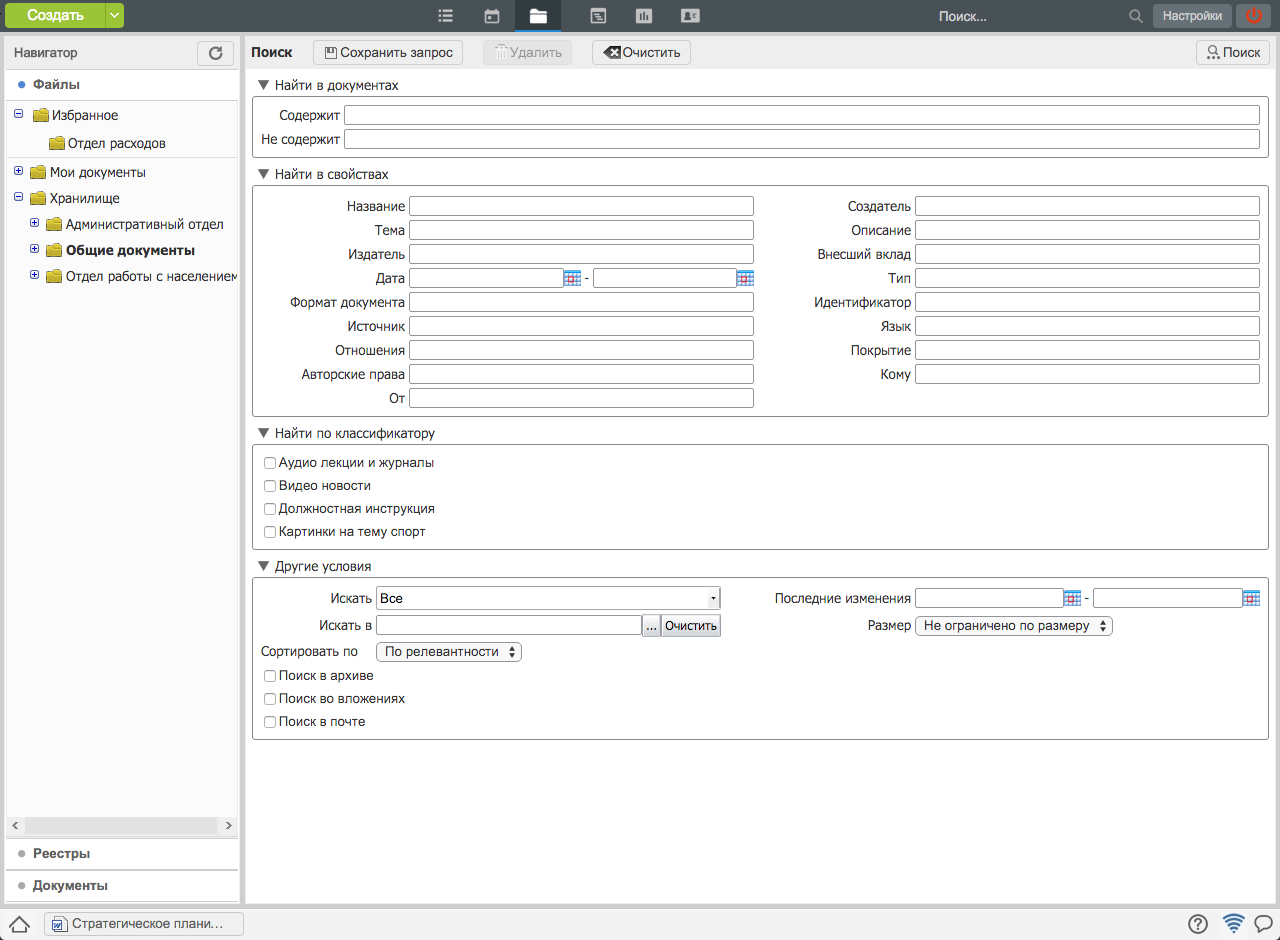
Also, there is an extended search feature to enter more file search parameters.
Visually, search results window is divided into two parts:
main area (center) lists all found text files;
в дополнительной области (справа) отображаются медиа и др. файлы.
Замечание
You can navigate to any other Storage folder from search result window by clicking required folder in navigator window, which always shows structure of storage folders independently of view regime (file list, search results).
